|
|
A new plugin installer is available to upload bulk documents using Microsoft Excel. Users will have to install Asite XL Bulk Upload Add ins on their local machine.
The Installer is available in the Downloads section of the Website http://www.asite.com/stuff/downloads.
By installing this plug in, Users will have
a. Automatically getting the Doc Ref. from the filename based on a naming convention the user specifies.
b. Automatically getting the Metadata of the document as on Asite based on the Document Ref.
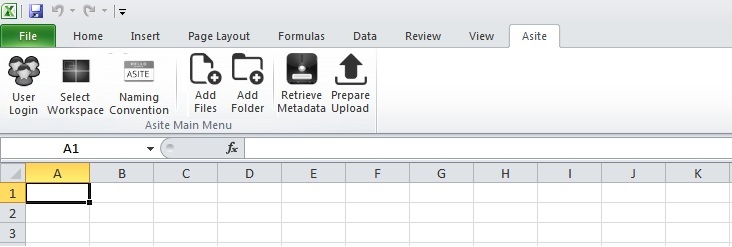
![]() Once successfully installed, Open a new Microsoft Excel sheet and click on 'Asite' Tab.
Once successfully installed, Open a new Microsoft Excel sheet and click on 'Asite' Tab.
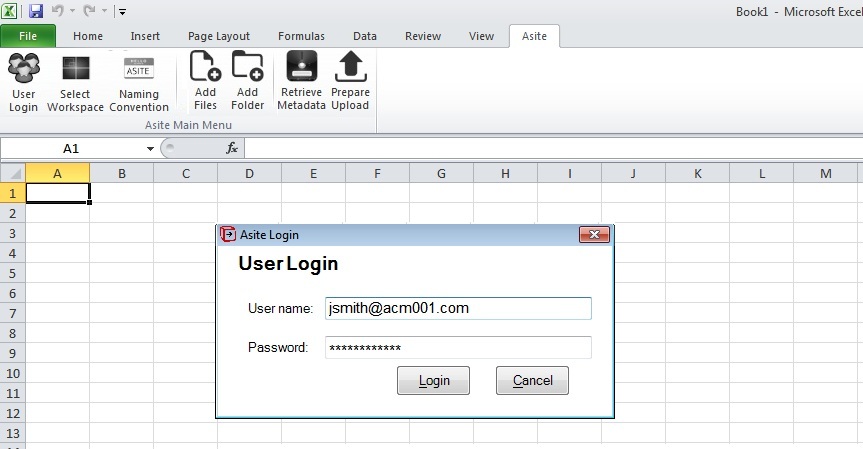
![]() To upload documents on Asite platform, users will need to log into the system. Click on 'User Login' and logged into the Asite system. (Refer below image)
To upload documents on Asite platform, users will need to log into the system. Click on 'User Login' and logged into the Asite system. (Refer below image)
![]() Once users login their details, users will have to select the workspace to upload the multiple documents. Click on 'Select Workspace' to select the workspace users will be uploading to. Workspace drop down list will show all the workspaces users have access to.
Once users login their details, users will have to select the workspace to upload the multiple documents. Click on 'Select Workspace' to select the workspace users will be uploading to. Workspace drop down list will show all the workspaces users have access to.
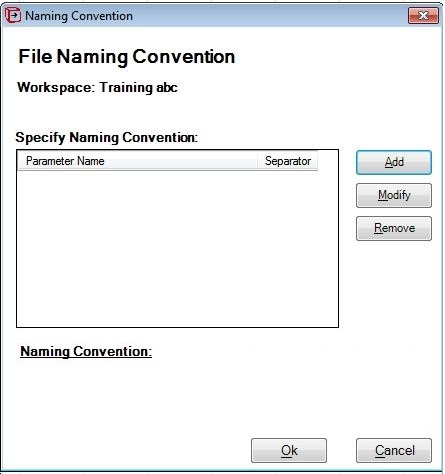
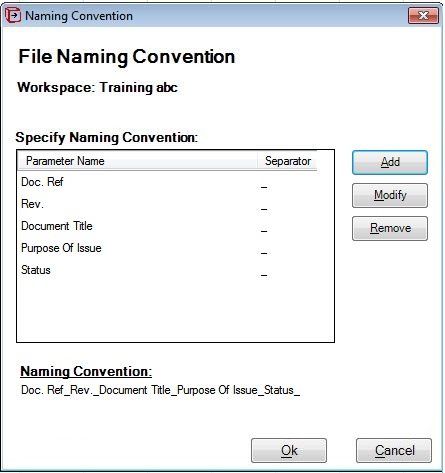
![]() Once a user has logged in and specified the workspace they are required to enter or confirm the naming convention for the project. The naming convention for the document reference must be specified or confirmed once the workspace has been selected by the user. After selecting the Workspace, File Naming convention window will open.
Once a user has logged in and specified the workspace they are required to enter or confirm the naming convention for the project. The naming convention for the document reference must be specified or confirmed once the workspace has been selected by the user. After selecting the Workspace, File Naming convention window will open.
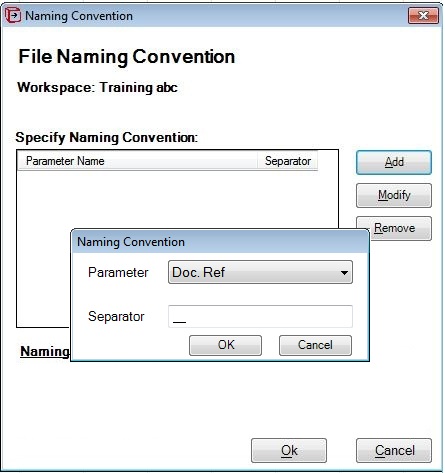
![]() To specify the Naming Convention, Click on 'Add' to specify the separator between two parameters. Within this drop down field users will have the option to specify the separator between Document Reference, Revision, POI, Status and Title.
To specify the Naming Convention, Click on 'Add' to specify the separator between two parameters. Within this drop down field users will have the option to specify the separator between Document Reference, Revision, POI, Status and Title.
![]() After defining the separator, naming convention will be specified and displayed in the same window. Once the user specifies the naming convention the details of this would be stored in a local temp user file.
After defining the separator, naming convention will be specified and displayed in the same window. Once the user specifies the naming convention the details of this would be stored in a local temp user file.
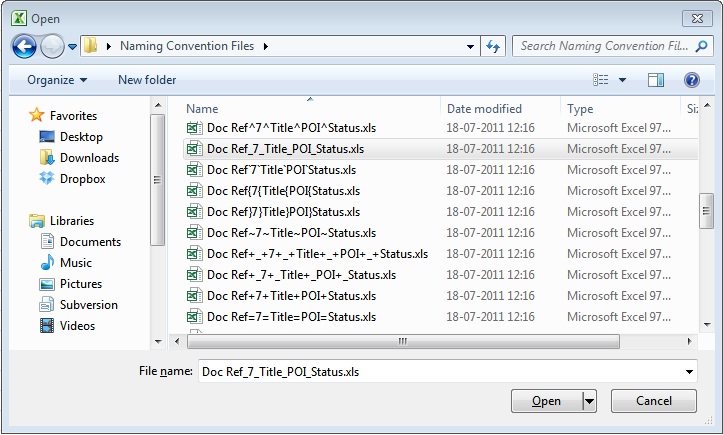
![]() After specifying the Naming convention, User can upload the file directly from Windows Explorer. User can select files based on the standard Naming conventions.
After specifying the Naming convention, User can upload the file directly from Windows Explorer. User can select files based on the standard Naming conventions.
![]() Files name must be matched with Naming convention method to get the functionality work. If this criteria does not match then file name will be considered as a Document Reference and rest of the attributes need to be entered.
Files name must be matched with Naming convention method to get the functionality work. If this criteria does not match then file name will be considered as a Document Reference and rest of the attributes need to be entered.
![]() Once the user has selected the files they can select the open button to import the file paths to the Upload tool.
Once the user has selected the files they can select the open button to import the file paths to the Upload tool.
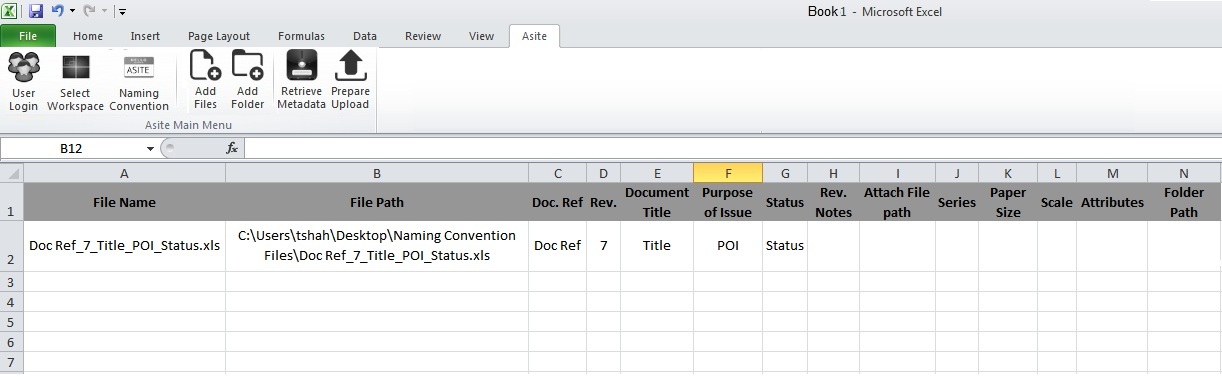
![]() Within the tool the file path will be displayed, with the file name intact, however the document reference and other fields will be populated based on the naming convention specified.
Within the tool the file path will be displayed, with the file name intact, however the document reference and other fields will be populated based on the naming convention specified.
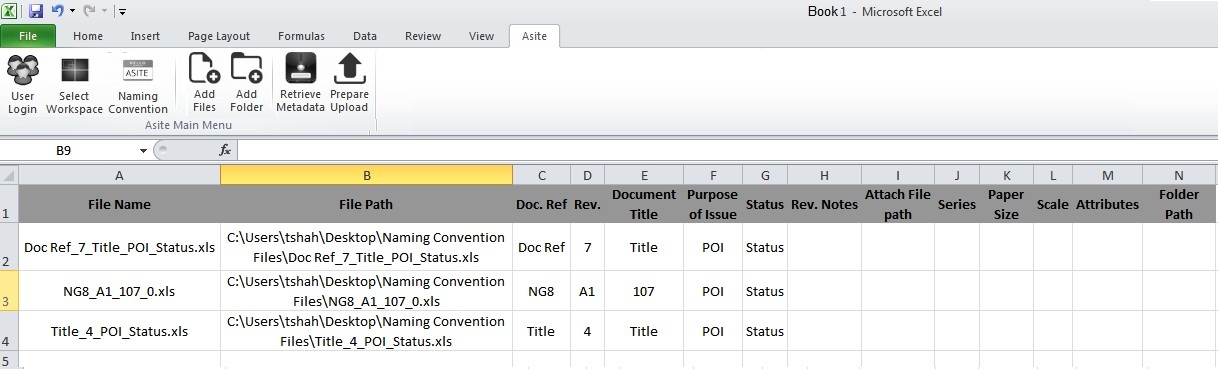
![]() If the user selects the Add Files option again, and selects additional files, these files will be appended to the existing list of files.
If the user selects the Add Files option again, and selects additional files, these files will be appended to the existing list of files.
![]() By clicking on 'Add Folder', the user will select a folder where the files they want to upload are placed. Once the user has selected the folder they press the open button to import the file paths to the Upload tool.
By clicking on 'Add Folder', the user will select a folder where the files they want to upload are placed. Once the user has selected the folder they press the open button to import the file paths to the Upload tool.
![]() Once the user has selected their files they will need to retrieve the metadata for the individual document references. Click on 'Retrieve Metadata'.
Once the user has selected their files they will need to retrieve the metadata for the individual document references. Click on 'Retrieve Metadata'.
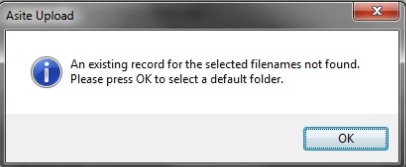
![]() By retrieving the metadata, system will ask users to select the folder path to upload the documents. Users will have to select the folder path for each document.
By retrieving the metadata, system will ask users to select the folder path to upload the documents. Users will have to select the folder path for each document.
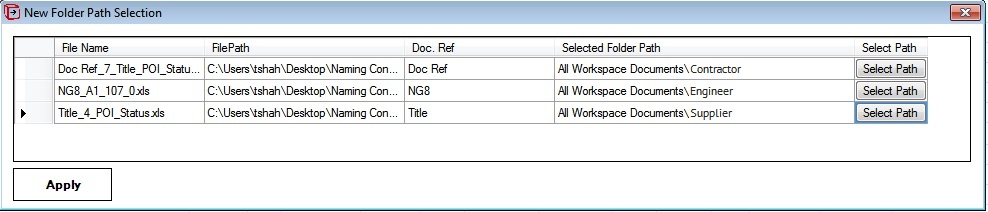
![]() If a document reference exists in more than one folder the user will be asked to select which reference they require.
If a document reference exists in more than one folder the user will be asked to select which reference they require.
![]() The final column within the spreadsheet will be a folder column. This folder column will show the user what folder the document reference exists in.
The final column within the spreadsheet will be a folder column. This folder column will show the user what folder the document reference exists in.
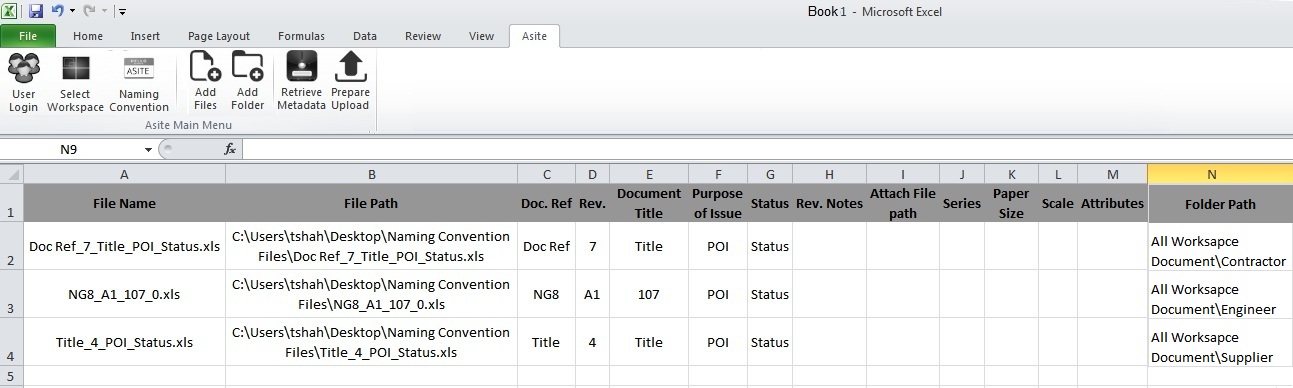
![]() Based on the workspace selected by the user, the tool will determine what custom attributes has been setup on the workspace. If a column for the attribute is not available within the tool the column should be added automatically. Also, if the attribute is a drop-down selection on the Workspace, the drop down will be created for the user to select the attribute on the tool.
Based on the workspace selected by the user, the tool will determine what custom attributes has been setup on the workspace. If a column for the attribute is not available within the tool the column should be added automatically. Also, if the attribute is a drop-down selection on the Workspace, the drop down will be created for the user to select the attribute on the tool.
![]() Based on the document reference the metadata for the existing reference will be added to the spreadsheet. If the document reference does not exist on the system then the fields will be created but no metadata will be entered however the custom attributes field will be populated as in point 1 above.
Based on the document reference the metadata for the existing reference will be added to the spreadsheet. If the document reference does not exist on the system then the fields will be created but no metadata will be entered however the custom attributes field will be populated as in point 1 above.
Note: The revision column will not be populated from the previous revision and will keep the revision number extracted from the filename.
![]() Once the user has entered all of their metadata they will have a button to Prepare Upload. Once they select this option the following will occur:
Once the user has entered all of their metadata they will have a button to Prepare Upload. Once they select this option the following will occur:
The tool will validate to ensure that all compulsory fields have been completed.
The system will copy all files specified within the template to the users profile directory location.
If there are multiple folders specified within the upload spreadsheet the system will advise the user that there are multiple folders selected and it will split the spreadsheet into multiple upload files. These files will be created within the C drive in user's profile directory location.
If there is a single folder specified the tool will create a single upload spreadsheet and place it in the C drive in user's profile directory location.
![]() The user will then log into the system and navigates to the relevant folder to upload the files as required
The user will then log into the system and navigates to the relevant folder to upload the files as required