Markups allow you to annotate documents without altering the document itself. All markup entities are saved in a markup file, which is associated and overlaid on the image. There can be more than one author per markup file. A new layer is automatically created for each new markup file author (determined by the login user name), allowing them to see other authors' markups, but not edit them.
![]() Availability
of "Markup" option may depend upon whether the "Commenting"
activity is locked or unlocked for the selected file.
Availability
of "Markup" option may depend upon whether the "Commenting"
activity is locked or unlocked for the selected file.
If the workspace is configured to use Universal Web Viewer, the file will open in Universal Web Viewer - Adoddle View as a separate popup. Click here for detailed help.
A) Create Markup using HTML Viewer
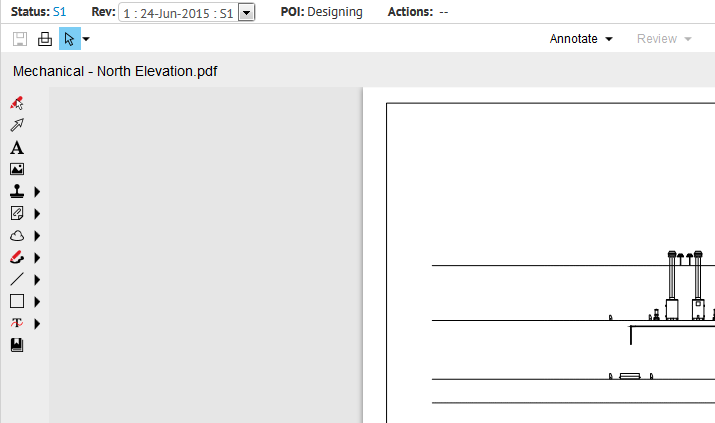
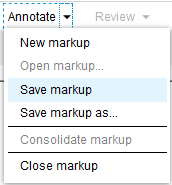
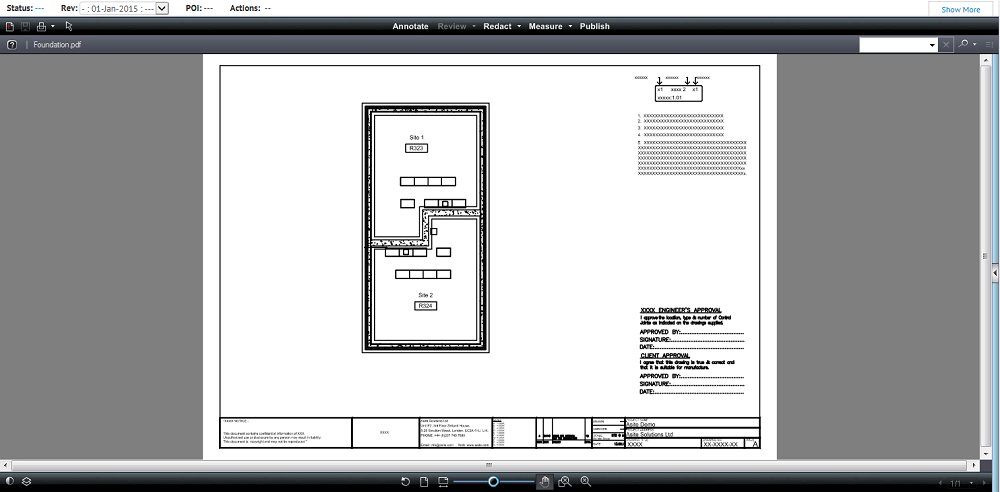
1. Open drawing (for example) and click on Annotate dropdown and select New Markup.

2. Clicking on 'New markup' link, it opens Markup Toolbar on left hand side.
3. The Markup toolbar contains related groups of markup tools. Markup tools remain active until another tool is selected. While using any of the markup tools, you can press the <Esc> key to abort the current entity creation before the last point is set. Escape will delete any portion of the markup entity that is drawn so far.

![]() Select markup: The
Select Markup tool allows you to grab markup entities to move, copy, resize,
reshape, or delete them.
Select markup: The
Select Markup tool allows you to grab markup entities to move, copy, resize,
reshape, or delete them.

![]() Arrow Pointer: The Arrow Pointer
tool allows you to draw an arrow. Press and hold the
left mouse button where you want the arrow point to begin, then drag and
release the mouse where you want the line to end. (As with any of the
markup and measurement tools, you can press <Esc> to abort the current
entity creation before it is set. Escape will reset the tool and delete
any unfinished portions created while clicking or dragging.) elect a line color, line style, and size from the Properties bar.
Arrow Pointer: The Arrow Pointer
tool allows you to draw an arrow. Press and hold the
left mouse button where you want the arrow point to begin, then drag and
release the mouse where you want the line to end. (As with any of the
markup and measurement tools, you can press <Esc> to abort the current
entity creation before it is set. Escape will reset the tool and delete
any unfinished portions created while clicking or dragging.) elect a line color, line style, and size from the Properties bar.

![]() Text: Click on
the Markup toolbar
to place text directly on the image (as opposed to in an annotation).
From the Markup Properties bar, select the desired font properties, then
type the desired text. You can adjust the font size by using the hotkeys
<Ctrl> + <+ or ->. Use + to increase font size and - to decrease
font size.
Text: Click on
the Markup toolbar
to place text directly on the image (as opposed to in an annotation).
From the Markup Properties bar, select the desired font properties, then
type the desired text. You can adjust the font size by using the hotkeys
<Ctrl> + <+ or ->. Use + to increase font size and - to decrease
font size.

![]() Insert Image: Use
this markup tool to insert external images (JPG, BMP, or PNG) into your
current markup layer. Once selected, images can be resized and positioned
where you want them.
Insert Image: Use
this markup tool to insert external images (JPG, BMP, or PNG) into your
current markup layer. Once selected, images can be resized and positioned
where you want them.

![]() Add Markup Stamp: Markup stamp button allows you to place
the stamps on the selected document. Click
here for detailed help.
Add Markup Stamp: Markup stamp button allows you to place
the stamps on the selected document. Click
here for detailed help.

![]() Changemark Notes: The Changemark
feature allows author of markups to assign a placeholder and descriptive
text and/or a hyperlink to a particular markup. All Changemarks contained
in the opened markup files appear in the Review Changemark tab. This allows
you to step through each Changemark annotation in all related documents
and images, so no comments are missed.
Changemark Notes: The Changemark
feature allows author of markups to assign a placeholder and descriptive
text and/or a hyperlink to a particular markup. All Changemarks contained
in the opened markup files appear in the Review Changemark tab. This allows
you to step through each Changemark annotation in all related documents
and images, so no comments are missed.
Note that additional combined Changemark tools are available from the Changemark tools group including Cloud Changemark, Arrow Changemark, Highlight Changemark, Highlight Text Changemark, Strikethrough Changemark and Checkview.

![]() Cloud:
You can draw clouds using the Cloud and
Polycloud tools. Click and hold the left mouse button and drag the mouse
pointer on the image to draw a cloud shape. For the Polycloud, move the
mouse pointer to where you want the first vertex to be and click the left
mouse button to set the point. Continue to do this until all points are
set.
Cloud:
You can draw clouds using the Cloud and
Polycloud tools. Click and hold the left mouse button and drag the mouse
pointer on the image to draw a cloud shape. For the Polycloud, move the
mouse pointer to where you want the first vertex to be and click the left
mouse button to set the point. Continue to do this until all points are
set.

![]() Line: The Line tool allows
you to draw straight lines in any direction. The Line Arrow tool adds
an anchor and end arrowhead style to a straight line entity. The Polyline tool allows you to draw
a jointed line. The
Crossout tool is
used to place an “X” over an area of the image.
Line: The Line tool allows
you to draw straight lines in any direction. The Line Arrow tool adds
an anchor and end arrowhead style to a straight line entity. The Polyline tool allows you to draw
a jointed line. The
Crossout tool is
used to place an “X” over an area of the image.

![]() Rectangle: The Solid Shapes group
allows you to draw solid (filled) or hollow (unfilled) Rectangle, Rounded
Rectangle, Ellipse, or Poly shapes.
Rectangle: The Solid Shapes group
allows you to draw solid (filled) or hollow (unfilled) Rectangle, Rounded
Rectangle, Ellipse, or Poly shapes.
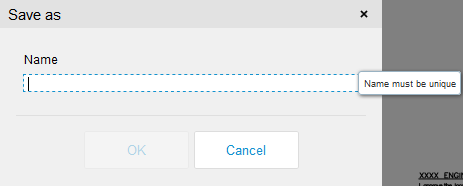
7. Once you have created a Markup, click on Save button to summon the Save Markup File dialog.
8. Type a Markup name in the text box and click Ok to save markup. System behavior will correspond to the Markup Options configured for the Project.
B) Create Markup using Advanced Viewer
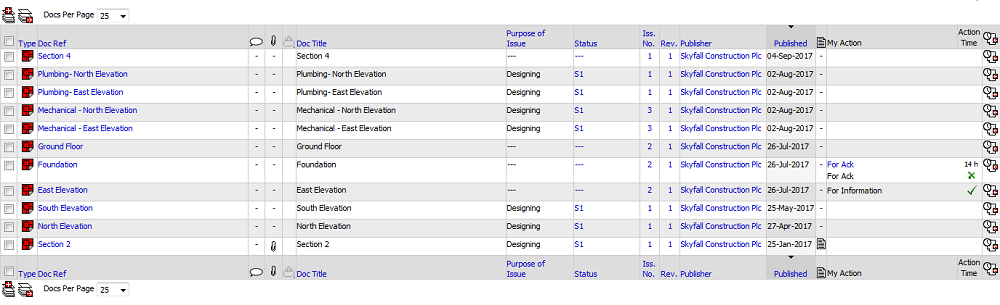
1. To create a markup using Advanced Viewer, open the concerned file by clicking on its Doc Ref on the Files listing page.
2. Clicking Doc Ref, the file opens Asite Viewer in a new window. Choose Advanced Viewer from top dropdown if other viewer is showing selected. Viewer allows you to view Discussion Threads and file content.
3. To create a Markup on this file click on Markup button.

4. Clicking on Markup button, it opens Markup options window below to it icon.
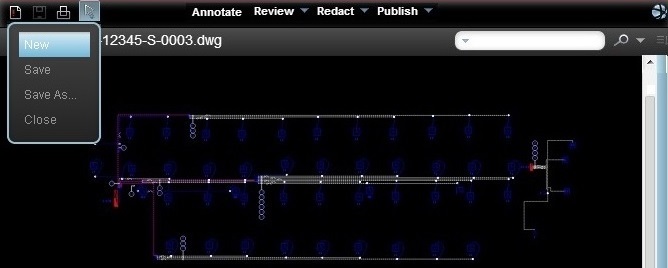
5. Click on 'New' link to create a new Markup on selected file. Clicking on 'New' markup link, it opens Markup Toolbar on left hand side.
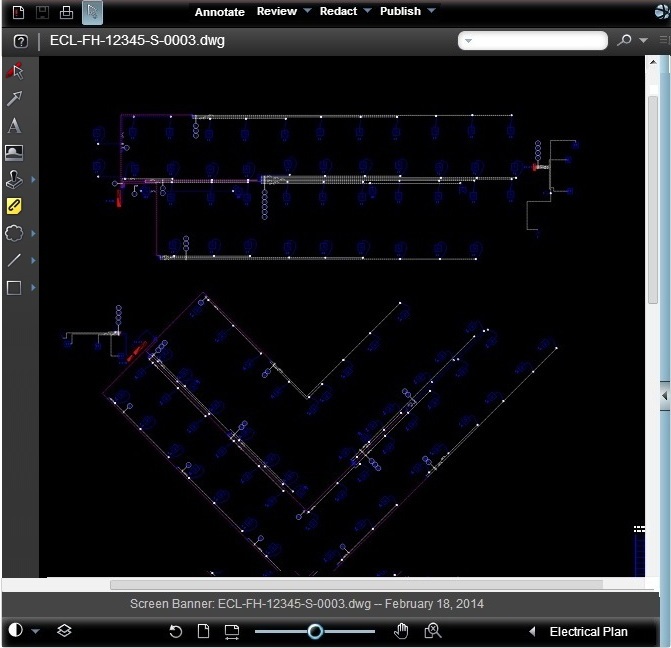
6. The Markup toolbar contains related groups of markup tools. Markup tools remain active until another tool is selected. While using any of the markup tools, you can press the <Esc> key to abort the current entity creation before the last point is set. Escape will delete any portion of the markup entity that is drawn so far.
![]()
![]() Select markup: The
Select Markup tool allows you to grab markup entities to move, copy, resize,
reshape, or delete them.
Select markup: The
Select Markup tool allows you to grab markup entities to move, copy, resize,
reshape, or delete them.

![]() Arrow Pointer: The Arrow Pointer
tool allows you to draw an arrow. Press and hold the
left mouse button where you want the arrow point to begin, then drag and
release the mouse where you want the line to end. (As with any of the
markup and measurement tools, you can press <Esc> to abort the current
entity creation before it is set. Escape will reset the tool and delete
any unfinished portions created while clicking or dragging.) elect a line color, line style, and size from the Properties bar.
Arrow Pointer: The Arrow Pointer
tool allows you to draw an arrow. Press and hold the
left mouse button where you want the arrow point to begin, then drag and
release the mouse where you want the line to end. (As with any of the
markup and measurement tools, you can press <Esc> to abort the current
entity creation before it is set. Escape will reset the tool and delete
any unfinished portions created while clicking or dragging.) elect a line color, line style, and size from the Properties bar.

![]() Text: Click on
the Markup toolbar
to place text directly on the image (as opposed to in an annotation).
From the Markup Properties bar, select the desired font properties, then
type the desired text. You can adjust the font size by using the hotkeys
<Ctrl> + <+ or ->. Use + to increase font size and - to decrease
font size.
Text: Click on
the Markup toolbar
to place text directly on the image (as opposed to in an annotation).
From the Markup Properties bar, select the desired font properties, then
type the desired text. You can adjust the font size by using the hotkeys
<Ctrl> + <+ or ->. Use + to increase font size and - to decrease
font size.

![]() Insert Image: Use
this markup tool to insert external images (JPG, BMP, or PNG) into your
current markup layer. Once selected, images can be resized and positioned
where you want them.
Insert Image: Use
this markup tool to insert external images (JPG, BMP, or PNG) into your
current markup layer. Once selected, images can be resized and positioned
where you want them.

![]() Add Markup Stamp: Markup stamp button allows you to place
the stamps on the selected document. Click
here for detailed help.
Add Markup Stamp: Markup stamp button allows you to place
the stamps on the selected document. Click
here for detailed help.

![]() Changemark Notes: The Changemark
feature allows author of markups to assign a placeholder and descriptive
text and/or a hyperlink to a particular markup. All Changemarks contained
in the opened markup files appear in the Review Changemark tab. This allows
you to step through each Changemark annotation in all related documents
and images, so no comments are missed.
Changemark Notes: The Changemark
feature allows author of markups to assign a placeholder and descriptive
text and/or a hyperlink to a particular markup. All Changemarks contained
in the opened markup files appear in the Review Changemark tab. This allows
you to step through each Changemark annotation in all related documents
and images, so no comments are missed.
Note that additional combined Changemark tools are available from the Changemark tools group including Cloud Changemark, Arrow Changemark, Highlight Changemark, Highlight Text Changemark, Strikethrough Changemark and Checkview.

![]() Cloud:
You can draw clouds using the Cloud and
Polycloud tools. Click and hold the left mouse button and drag the mouse
pointer on the image to draw a cloud shape. For the Polycloud, move the
mouse pointer to where you want the first vertex to be and click the left
mouse button to set the point. Continue to do this until all points are
set.
Cloud:
You can draw clouds using the Cloud and
Polycloud tools. Click and hold the left mouse button and drag the mouse
pointer on the image to draw a cloud shape. For the Polycloud, move the
mouse pointer to where you want the first vertex to be and click the left
mouse button to set the point. Continue to do this until all points are
set.

![]() Line: The Line tool allows
you to draw straight lines in any direction. The Line Arrow tool adds
an anchor and end arrowhead style to a straight line entity. The Polyline tool allows you to draw
a jointed line. The
Crossout tool is
used to place an “X” over an area of the image.
Line: The Line tool allows
you to draw straight lines in any direction. The Line Arrow tool adds
an anchor and end arrowhead style to a straight line entity. The Polyline tool allows you to draw
a jointed line. The
Crossout tool is
used to place an “X” over an area of the image.

![]() Rectangle: The Solid Shapes group
allows you to draw solid (filled) or hollow (unfilled) Rectangle, Rounded
Rectangle, Ellipse, or Poly shapes.
Rectangle: The Solid Shapes group
allows you to draw solid (filled) or hollow (unfilled) Rectangle, Rounded
Rectangle, Ellipse, or Poly shapes.
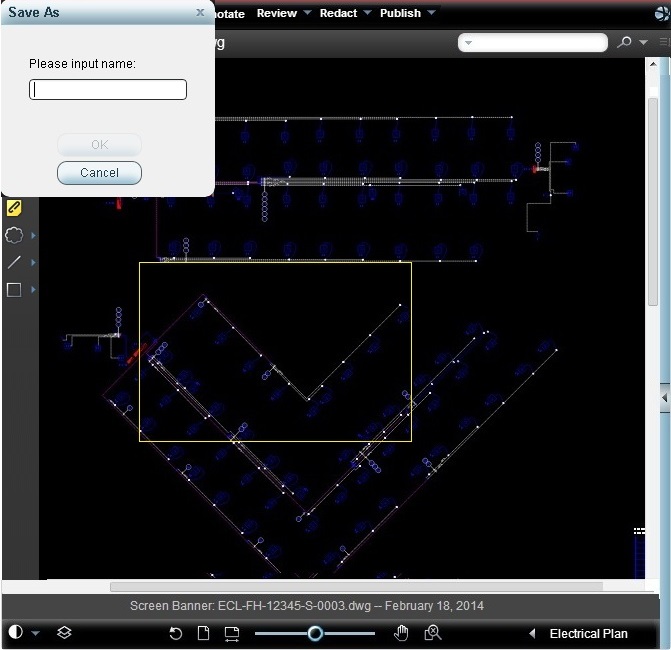
7. Once you have created a Markup, click on Save button to summon the Save Markup File dialog.

8. Type a Markup name in the text box and click Ok to save markup. System behavior will correspond to the Markup options configured for the Project.
FAQ's
Q: I do not see Create Markup Icon while viewing any document
A: The ability to Create Markups is available only for the users with “Can Create Comments" Workspace level privilege assigned to them
Useful Links: