When each drawing is published to a folder, a unique QR code will be generated for the drawings. To generate QR code for drawings, users will have to set the rules before publishing the drawings. Follow the steps given below to set the rules.
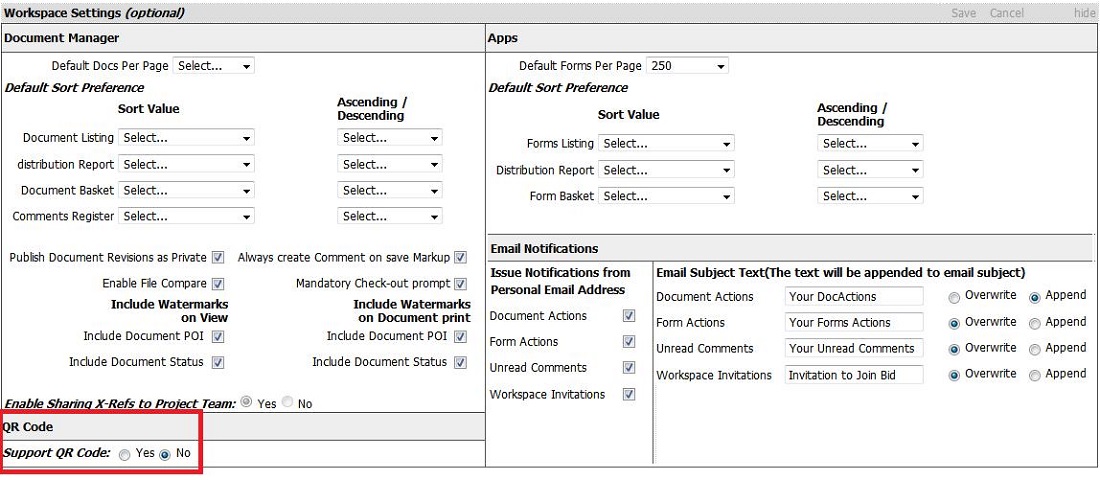
A new section for definition of QR functionality has been introduced in the Workspace settings for Administrators to define if QR code functionality is to be enabled.
Select ‘Yes’ to enable QR Code functionality.
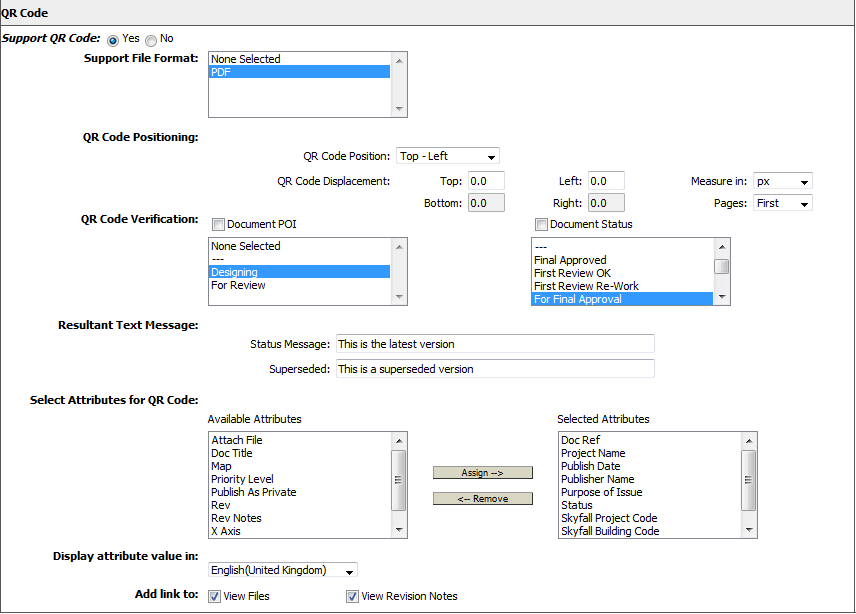
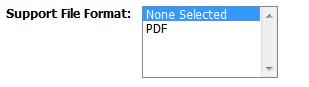
Administrator will have to define the file type option to generate QR Code on specific file type documents. Initial Release has extended support for PDF only.
Administrators will have to define the position where the QR Code needs to be placed on the document revision.
Options available will be:
Top – Left,
Top – Right,
Top – Center,
Bottom – Left,
Bottom – Right,
Bottom – Center with a value to be selected mandatorily.
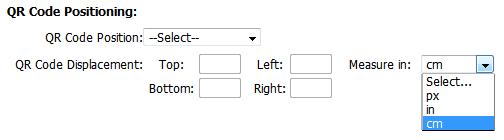
Administrator will also be able to specify the displacement in terms of cell padding to adjust the exact position of the generated QR Code on the document revision.
![]() If
Administrator selects Top – Left
position to place a generated QR Code on the document revision then
administrator can specify the displacement for Top and Left.
If
Administrator selects Top – Left
position to place a generated QR Code on the document revision then
administrator can specify the displacement for Top and Left.
![]() If
Administrator selects Top – Right
position to place a generated QR Code on the document revision then
administrator can specify the displacement for Top and Right.
If
Administrator selects Top – Right
position to place a generated QR Code on the document revision then
administrator can specify the displacement for Top and Right.
![]() If
Administrator selects Top – Center
position to place a generated QR Code on the document revision then
administrator can specify the displacement for Top only.
If
Administrator selects Top – Center
position to place a generated QR Code on the document revision then
administrator can specify the displacement for Top only.
![]() If
Administrator selects Bottom
– Left position to place a generated QR Code on the document revision
then administrator can specify the displacement for Bottom and Left.
If
Administrator selects Bottom
– Left position to place a generated QR Code on the document revision
then administrator can specify the displacement for Bottom and Left.
![]() If
Administrator selects Bottom
– Right position to place a generated QR Code on the document revision
then administrator can specify the displacement for Bottom and Right.
If
Administrator selects Bottom
– Right position to place a generated QR Code on the document revision
then administrator can specify the displacement for Bottom and Right.
![]() If
Administrator selects Bottom
– Center position to place a generated QR Code on the document revision
then administrator can specify the displacement for Bottom only.
If
Administrator selects Bottom
– Center position to place a generated QR Code on the document revision
then administrator can specify the displacement for Bottom only.
Administrator can specify the displacement in terms of px (pixels), in (inches), cm (centimetre), pt (point).
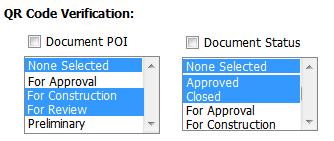
Administrators will have to set the combination of QR Code during verification of the same. The combination will be on Latest / Superseded Revision AND / OR Any or selected Document Purpose of Issue AND / OR Any or Selected Document Status.
Administrators can also select one or multiple Document POI / Document Status.
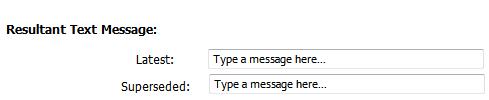
Administrators will have to set a Response text message which is to be displayed on the device of the user on verification via QR Code.
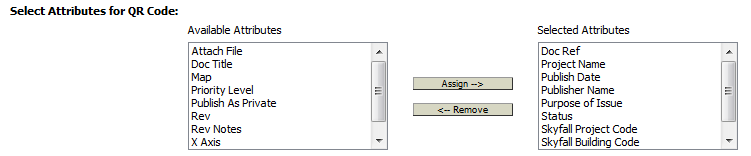
From the 'Available Attributes' dropdown list,
select the attributes you want to appear for the users while they scan
the QR code. Please note that the attributes list includes both standard
attributes as well as custom attributes. Use the right arrow button to
move them to the selected attributes list. You can select multiple attributes
at a time by using the 'Ctrl' key.
Accordingly, to remove any of the 'Selected Attributes', select them from
the 'Selected Attributes' dropdown list. Use the left arrow button to
move them back to the available attributes list. Use the up and down arrow
keys to set the display sequence for selected attributes.
Select the language in which the
attribute labels / values for selected attributes should be displayed
when the user scans the QR code.
Note: Labels / values will respect the language preference set by user
under their respective login.

Tick the boxes to 'View File' and / or 'View Revision Notes' based on what you want the users to see while they scan the QR code. Clicking the 'View File' link will take users to the Adoddle File Viewer with the relevant file open to view. Clicking the 'View Revision Notes' will take users to a web page containing revision notes for the relevant file.

The Site Manager or Front Line Staff member who wants to verify that the document is latest one or not, will have to scan a QR Code of the document by the mobile device. Necessary Apps to scan the QR code will need to be installed.
The QR Code values will go for the verification process by the hyperlink of the QR Code of the document
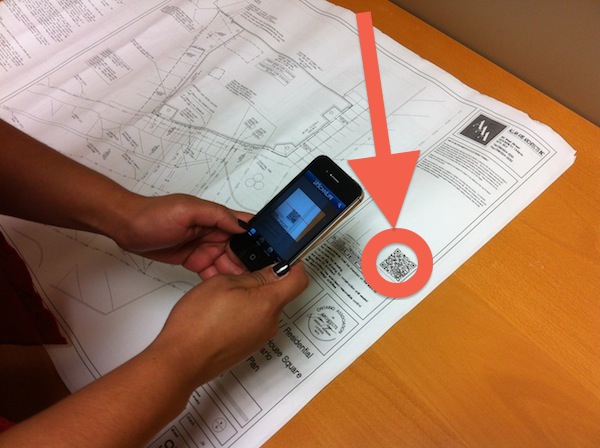
The Site Manager or Front Line Staff member who scanned the QR Code from the mobile device will get a result on the mobile device as per the QR code configuration.
Useful Links:
Publish Documents & Drawings - Standard Upload